Monday, February 4, 2013
Saturday, December 15, 2012
My trip to the Bead Factory
Beads Factory
810 Maple Avenue Los Angeles, CA 90014
I had been wanting to make a trip to the Beads Factory which is in the heart of downtown Los Angeles. Where I live, there just aren't very many bead stores. The few we have don't offer the same variety as well as low prices as different stores I have found in Los Angeles. With that being said, the less than 2 hour drive to LA is always worth it to me!
I was too distracted by the millions of beads all around me to remember to take some pictures of the store, so I "borrowed" some pics to give you an idea of what the store looks like
As soon as I walked into this store, I was in Heaven, yet, completely overwhelmed at the same time. Right when I walked in, I realized that this store was going to be more overwhelming than I imagined. Given the fact that I had just finished dealing with LA traffic, you could say that "overwhelmed" is a great adjetive to describe parts of my day. I didn't know where to start. The checkout area was to my right; to the left, a separate room with beads; straight ahead, the big ass store that awaited me. Not to mention the walls filled with beads from top to bottom. I had a couple of things that I had been specifically meaning to find/restock on, but other than those few things, I was there to find new, unique things. (which I did!)
Once I had a couple of minutes to figure out the layout of the merchandise, I was feeling a little more confident about where the heck to start. Yes, this is the "Bead Factory", but as you may have guessed, there is more than beads. Even the selection of different chains they have to choose from is amazing. Chunky chains, somewhat chunky chains, delicate chains, unique fancy chains. I have never seen so many chains in my life! They even have tons of feathers to choose from.
A glimpse inside....
With this angle, you see a majority of the store...but yes, there is more! To the left of where this picture was taken, there is a separate room with more merchandise. To the right is a huge, endless wall filled with all sorts of different beads. Pendants and charms can be found in the middle aisles.

Link for these photos: http://www.yelp.com/biz_photos/bead-factory-los-angeles?select=EnV04Zuwlh_xZp732-WUdw#F3Va4vH2903dgvqTDLOu2A
Before I went to this store, I read reviews on Yelp, which warned me not to expect the friendliest staff in the world. Those reviews were correct. The employees are not outright rude, you just have to pull some teeth sometimes to get the help you need.
Parking
Another important tidbit. There is a parking garage across the street which has roof parking. I paid $5 and was parked there close to three hours. It was so easy, I just parked and off I went. For a minute I debated if I should attempt street parking, but those hopes were quickly dashed by reality. Ha, street parking in downtown LA? Maybe on a brave day. I recommend just going for the parking garage, but to each his own.
So, to anyone who has never visited this store and lives in Southern CA, I highly recommend a trip to this store!
With that being said, happy beading.
Labels:
Jewelry
Saturday, December 8, 2012
New blog for my jewelry- Molly Jean Jewelry
Please check out my new blog for my jewelry, www.mollyjeanjewelry.blogspot.com
Pride and Pearls has been fun, but I don't really update it much anymore. My free time is spent working on jewelry, so I figured if I am going to be blogging, I will focus on the new one. Thanks for checking it out!
Here are some pictures of some of my pieces:

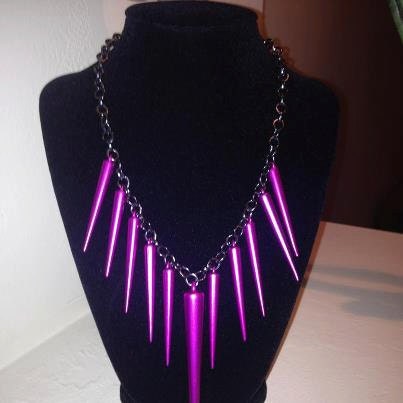
Spike necklace- Hot pink spikes on a gunmetal chain. $15.00
https://www.etsy.com/listing/117421612/pink-spike-necklace

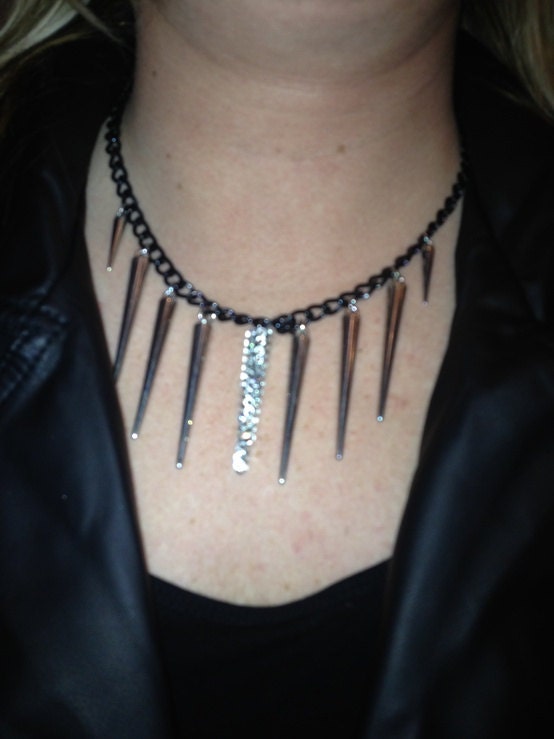
https://www.etsy.com/listing/114765371/silver-spike-necklace-on-black-chain?ref=v1_other_2
Silver Spike necklace featuring Spike covered in rhinestones

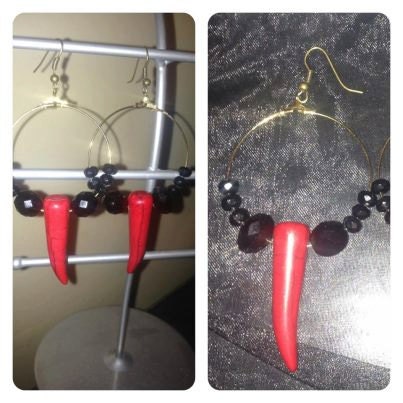
These red and black earrings are eye catching. Love these! Right now only $5.00 https://www.etsy.com/listing/117556774/red-and-black-hoop-earrings

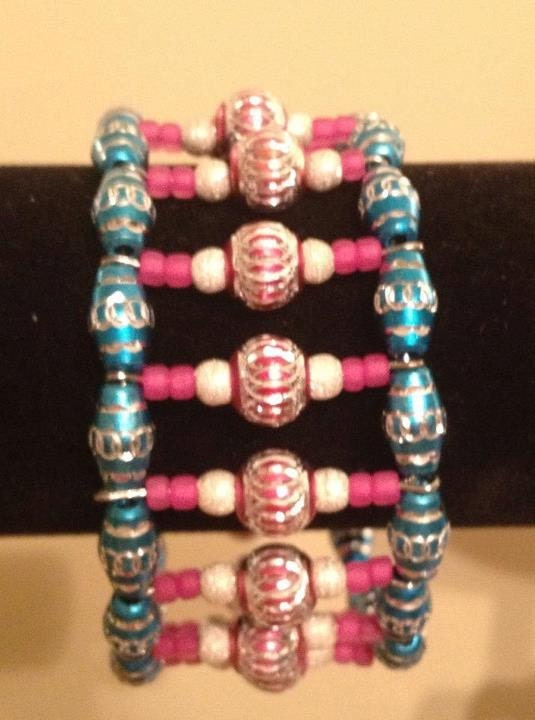
Wire-wrapped bracelet https://www.etsy.com/listing/110059970/beaded-and-wirewrapped-bracelet
and much more!
Pride and Pearls has been fun, but I don't really update it much anymore. My free time is spent working on jewelry, so I figured if I am going to be blogging, I will focus on the new one. Thanks for checking it out!
Here are some pictures of some of my pieces:

Spike necklace- Hot pink spikes on a gunmetal chain. $15.00
https://www.etsy.com/listing/117421612/pink-spike-necklace

https://www.etsy.com/listing/114765371/silver-spike-necklace-on-black-chain?ref=v1_other_2
Silver Spike necklace featuring Spike covered in rhinestones

These red and black earrings are eye catching. Love these! Right now only $5.00 https://www.etsy.com/listing/117556774/red-and-black-hoop-earrings

Wire-wrapped bracelet https://www.etsy.com/listing/110059970/beaded-and-wirewrapped-bracelet
and much more!
Labels:
Jewelry
Saturday, September 22, 2012
2 Broke Girls necklace
Caroline's Necklace from Two Broke Girls: How To
About, oh 6 months ago, I said I would do a tutorial on how to do Caroline's necklace. I'm not much of a vlogger and tutorials written can be pretty lengthy, so I've been putting it off. I will do a short and sweet run through of how to do this necklace and include certain youtube links that will teach you the techniques needed.
Close up picture- below is one I made a few months ago
This necklace does take a while to make and certain parts can be a bit tedious. With that being said, take your time making it because you want all the sets of pearls to be equal in length. You also want to make sure that the circles you make with the eyepins don't come out sloppy.
Let's get to it...to make this necklace
7. Chain nosed pliers
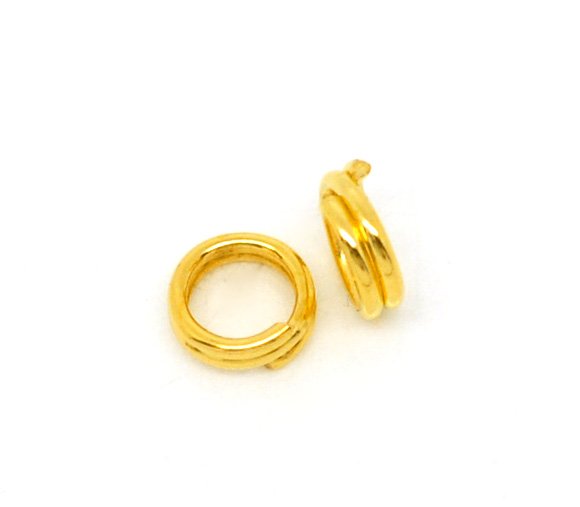
8. Gold split jump rings
You will also need to watch this youtube video in order to know how to create the sets of pearls. You will need to know how to create circles using round nosed pliers, which is why I am including this youtube link: http://www.youtube.com/watch?v=OCBJnOeXwds
After watching this video and practicing a few times, you should have an idea of how to make the circles.
You are going to take your smaller pearls and put all of those onto the headpins. I make 18 sets of pearls when I do this necklace. You are then going to cut some of the wire off of the remaining headpin and form a circle, (which you learned how to do in the youtube video) which will attach to the eyepin. You will take your larger pearls and put those on the eyepins. You will connect the small pearl that is on the eyepin to the larger pearl on the headpin by making circles with the wire.
Cut a piece of chain, approx 12 inches long
ps- if you haven't made jewelry before you will find this necklace challenging. Let me know in comments or email if you need more help.
Let's get to it...to make this necklace
You will need:
1. Chain of your preference. This is a statement necklace and with the amount of pearls you will be hanging from it, you don't want to select a dainty chain that won't be able to support the pearls, so keep that in mind.
2. Gold Eyepins
You can find these at any arts and crafts store, such as Michael's.3. Gold Headpins
4. Two different sizes of pearls
Larger pearls sit on top with the smaller pearls hanging below. Ivory or white pearls, whichever your prefer. I like to have brighter pearls for this necklace so I choose white.
5. Jewelry clasp/closure piece.
I recommend using a toggle for this necklace
6. Round nose pliers
7. Chain nosed pliers 
8. Gold split jump rings

You will also need to watch this youtube video in order to know how to create the sets of pearls. You will need to know how to create circles using round nosed pliers, which is why I am including this youtube link: http://www.youtube.com/watch?v=OCBJnOeXwds
After watching this video and practicing a few times, you should have an idea of how to make the circles.
You are going to take your smaller pearls and put all of those onto the headpins. I make 18 sets of pearls when I do this necklace. You are then going to cut some of the wire off of the remaining headpin and form a circle, (which you learned how to do in the youtube video) which will attach to the eyepin. You will take your larger pearls and put those on the eyepins. You will connect the small pearl that is on the eyepin to the larger pearl on the headpin by making circles with the wire.
Cut a piece of chain, approx 12 inches long
Cut a second piece of chain, approx 10 inches long
Take two split gold jump rings and attach your chain to the jump rings, making a 2 layer necklace.
You should have the shorter chain on top, longer chain on bottom.
Once this is done, start attaching the pearls to the chain. Start from the center and work your way outwards, making sure each side is matching up.
I did my best to explain this with just words. Maybe one day I will post my own video. Until then, good luck with your necklace!
Take two split gold jump rings and attach your chain to the jump rings, making a 2 layer necklace.
You should have the shorter chain on top, longer chain on bottom.
Once this is done, start attaching the pearls to the chain. Start from the center and work your way outwards, making sure each side is matching up.
I did my best to explain this with just words. Maybe one day I will post my own video. Until then, good luck with your necklace!
ps- if you haven't made jewelry before you will find this necklace challenging. Let me know in comments or email if you need more help.
Labels:
Jewelry,
two broke girls
Subscribe to:
Posts (Atom)